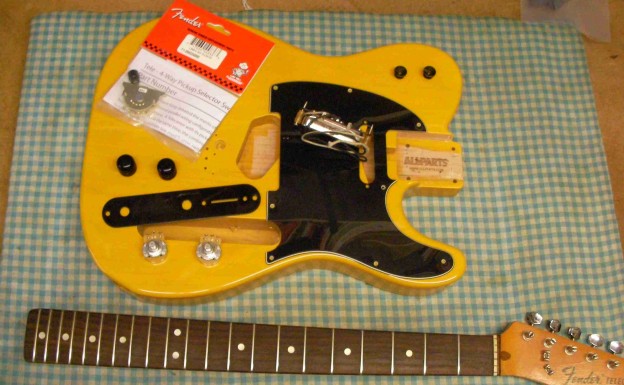
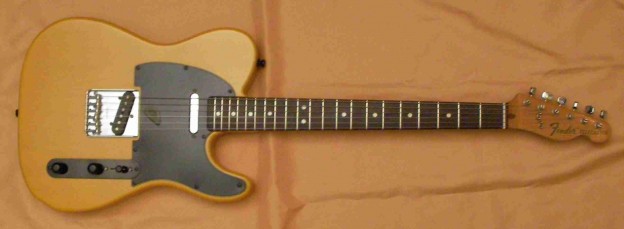
Wow, an interesting mix of old and new. The neck is genuine Fender, but I don’t know about the rest. The body’s probably the heaviest Telecaster I’ve ever come across.

I’m going to fit the neck to a new body with a mix of old and new hardware.
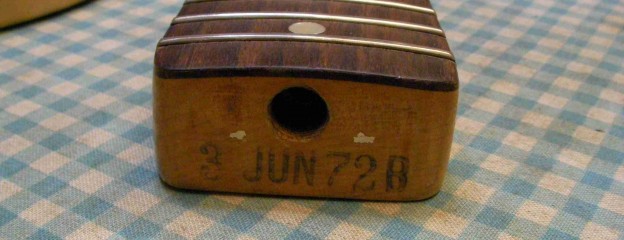
The first stage is to sort out the neck. It’s a proper 1972 Fender neck..

Actually It’s actually not a great neck though, it’s had a re-fret at some point but the frets were never dressed and so are quite uneven. Some of the fret ends are rather sharp as well.
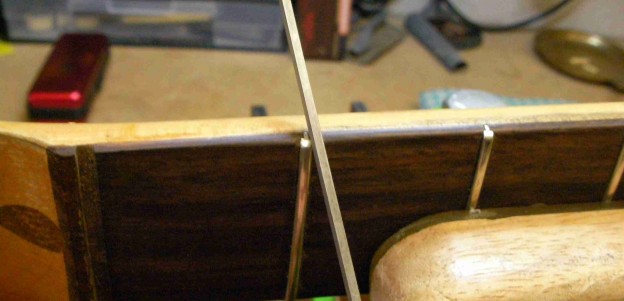
Before I can do anything I need to take out the nut.
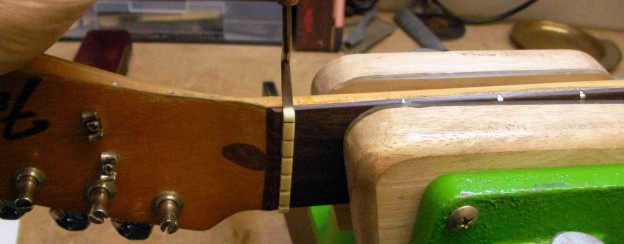
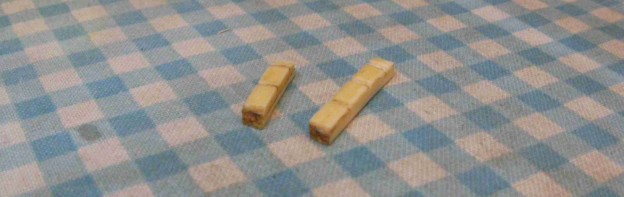
unfortunately it came out in 2 pieces. It’s been broken before, you can see the dirt in the break. It’ nice to keep original parts, but not broken ones!
Before dressing the frets I sorted out the sharp ends. It could just be that the wood has shrunk with age, as it dries out, leaving sharp edges. In this case though I just don’t think they were finished very well.
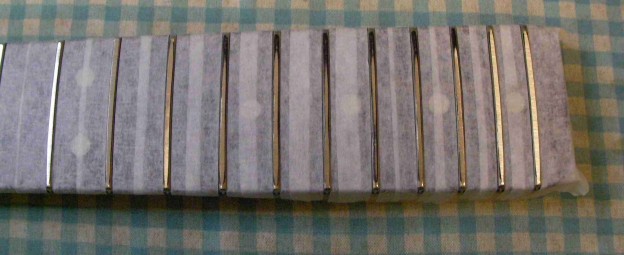
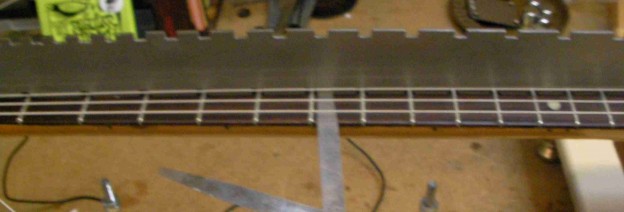
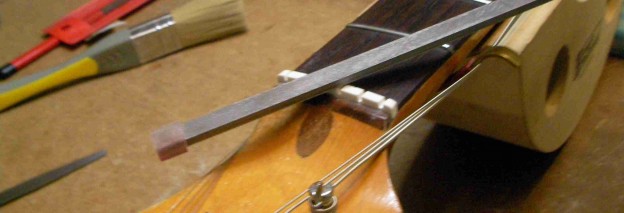
With the ends smoothed down it’s time to dress the tops. it’s very important that the neck’s completely flat before starting.
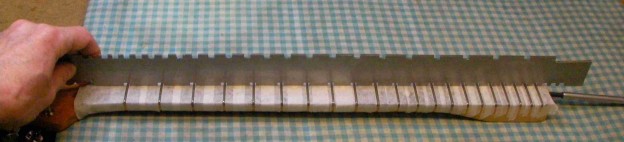
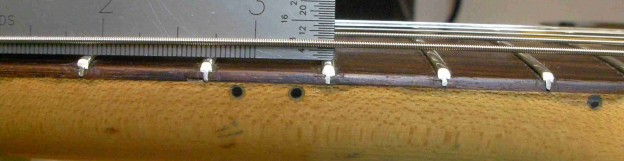
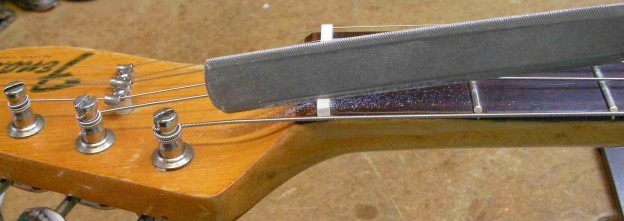
I use a calibrated beam and sticky backed sandpaper.
I marked the fret tops with black marker so you can see where the beam is touching and therefore, where the low points are. This is about half way through.
There are some quite low spots, around the 15th to 20th, on the treble side, but if I go that low the rest of the frets won’t have much life left. I’m pretty sure once it’s all back together it’ll play OK though.
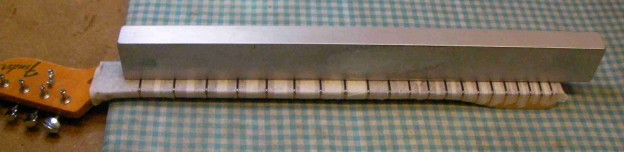
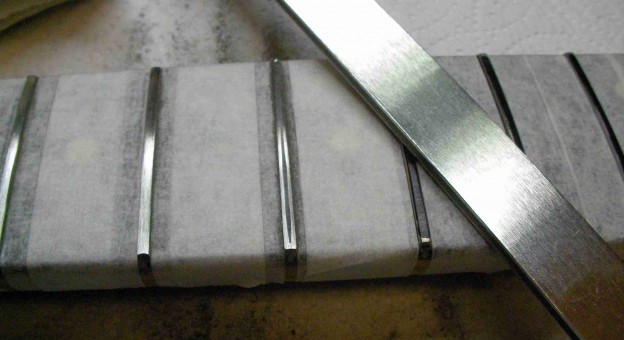
With the tops all at the same level they need to be rounded off again. The 2 on the left have been done, the middle one is half way through and the ones on the right are still flat on top…
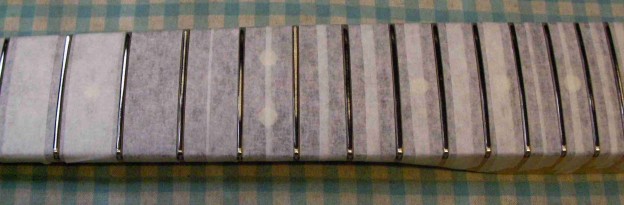
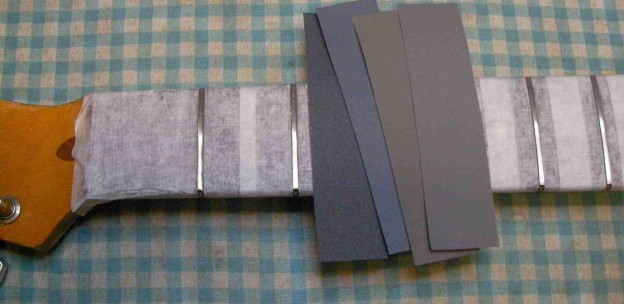
With that done each one needs polishing with 4 levels of micromesh, to bring back a proper shine.
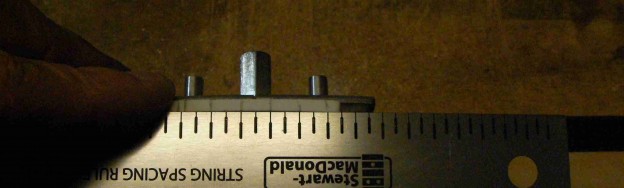
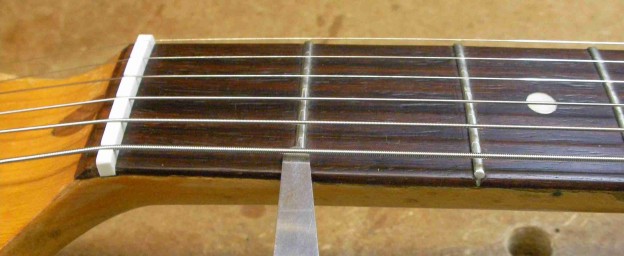
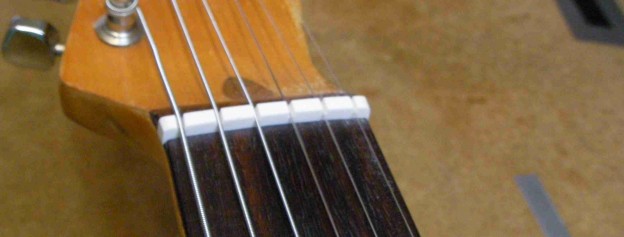
With the frets done it’s back to that nut. The blank is a little large so need to cut it down to size..
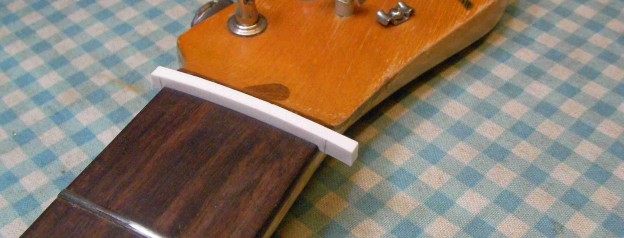
and then make sure the curve of the bottom matches the curve of the nut slot.

It’s got no string slots so I need to work out where they need to go as well.
I’ll cut the slots down the right depth and shape the top when I do the final setup.

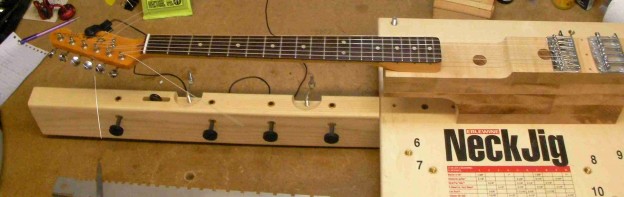
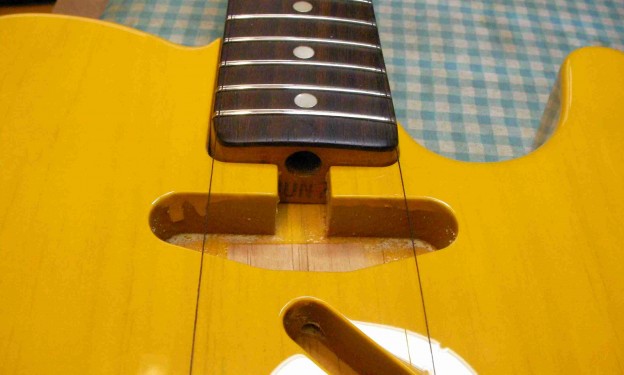
Because the truss-rod adjustment is on the heel of the neck it’s impossible to adjust it with the guitar fully assembled, so I put it on the jig. That way I can measure the neck set with strings at full tension.
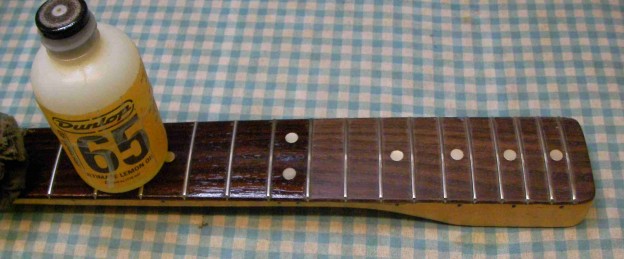
One more thing to do with the neck, a bit of a clean…

and oil…
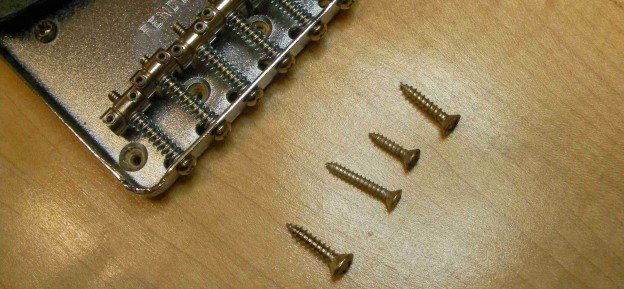
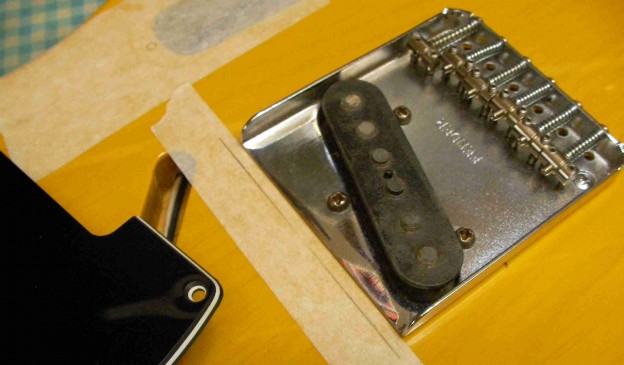
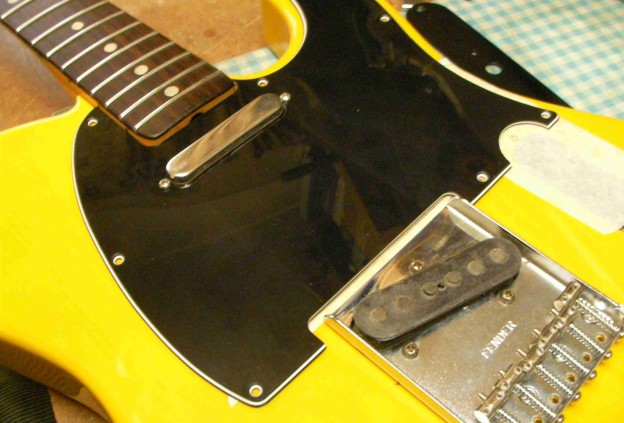
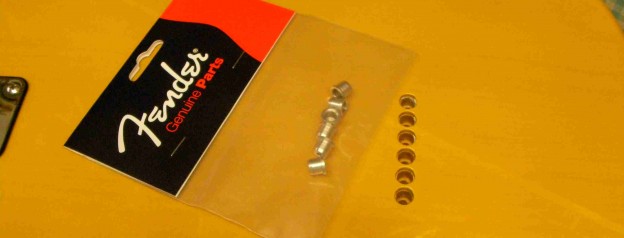
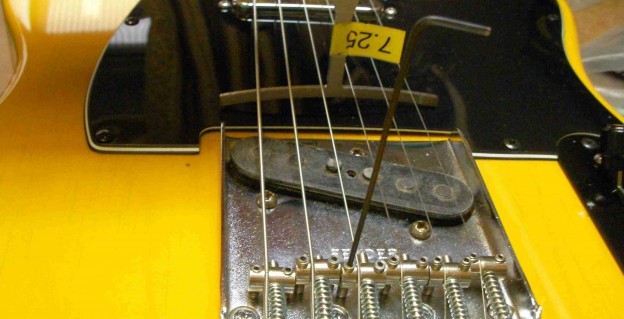
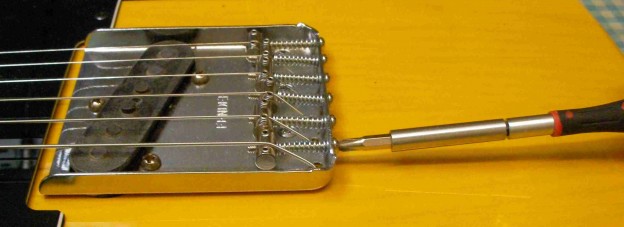
I’m re-using some of the old parts, including the ashtray bridge and bridge pickup. I think I’ll go for new screws though, there were a right mixture of 4 different ones on the old body!
I need the bridge in place first so that I can get the right line on the neck.
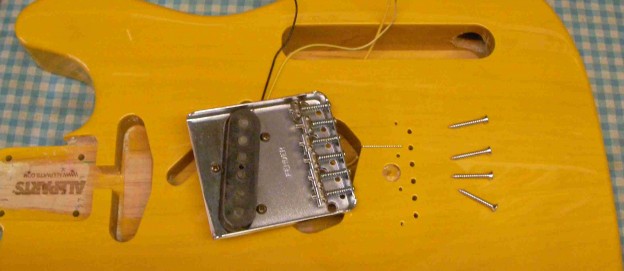
It fittd the pocket on the new body nicely, just a little tweek to make sure it lines up perfectly.
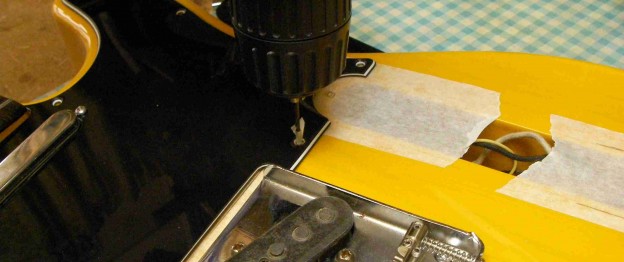
Getting the scratchplate in exactly the right place can be tricky sometimes, the devil’s in the detail. I’ve marked a line on some tape exactly parallel with the bridge plate.
That looks good.
So carefully drill the screw holes.
Next step the wiring. Going for a 4 way selector to give the extra option of the pickups is series as well as the other 3 standard Tele’ selections. All new pot’s, switch and a good quality orange drop tone cap.
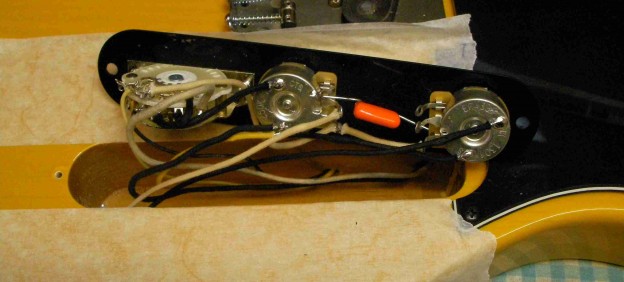
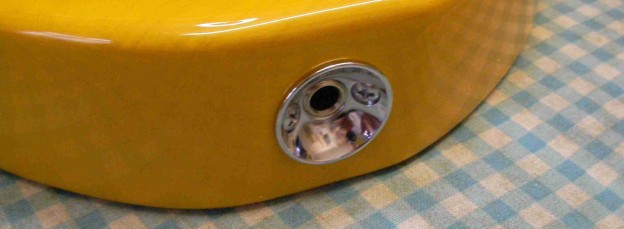
and a nice new jack socket.
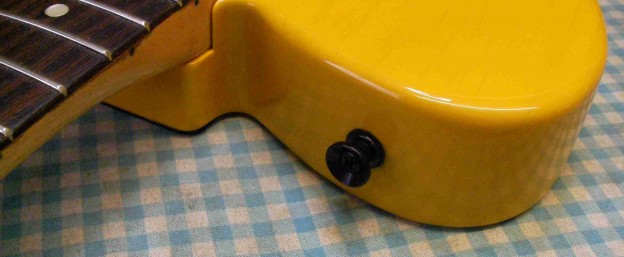
Add new strap buttons and it’s taking shape.
The last parts, all It needs now is a set of strings and a setup.

The neck set was already done on the jig so that’s fine.
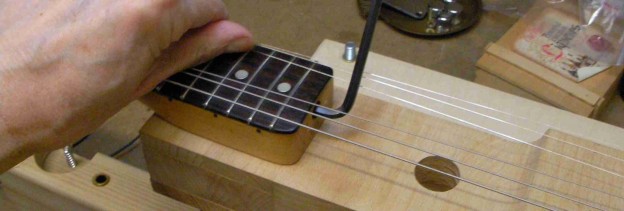
Next the action at the action at the 12th fret. Starting with the outside “E” strings.
It was a little high so drop the bridge saddle a little.

With the outside strings heights set, then adjust the others to match the radius of the fretboard.
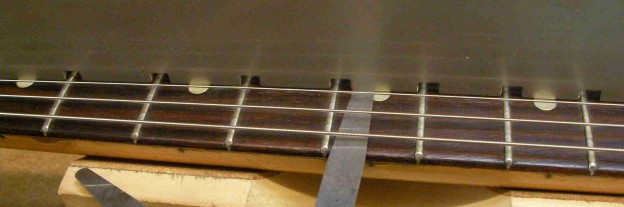
Back at the 1st fret the action was very high…
so I need to cut the slots in the new nut to the right depth.
The slots are quite deep….
so I need to take a little off the top of the nut.
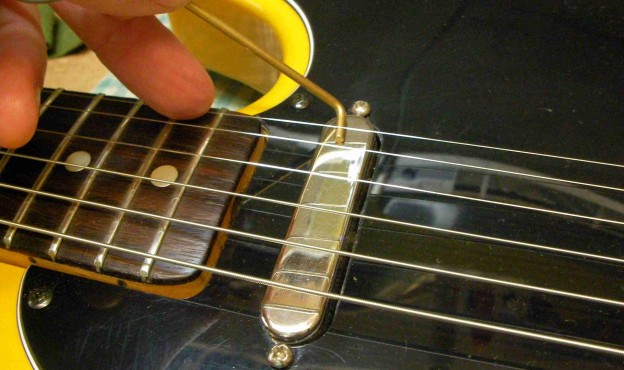
Next the intonation. To make sure it plays in tune all the way up and down the neck.
Lastly the pickup heights. I’ll need to check them by plugging it in, so this is just a starting point.
So there it is, an interesting mix of old and new.
To see what else I can do check out www.guitar-george.co.uk
And a word or two from the owner:
“Mine is the Hybrid Tele that George worked his magic on. 1972 Neck and some other original parts but a homemade body that was truely awfulI. It was unplayable! I asked him to use as much of the original guitar as he could. He did and gave the rest a modern twist. I didn’t want to pretend the whole guitar was original and with Georges advice I couldn’t be happier with the result. A true one-off. I think it looks gorgeous and the tones available are great. Thanks so much for your skill George. It was a real pleasure talking over the project with you and then the end result was way better than I dared hope. You are the man! Thanks.”